02_描边追加
添加描边Pass
参数增加
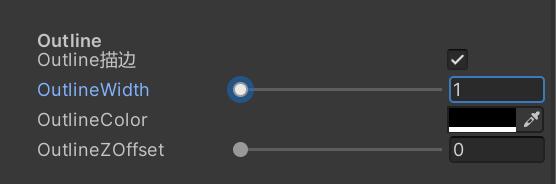
新增外描边宽度颜色和Z偏移参数,以及Toggle开关控制描边Pass是否开启 
 pass内声明
Pass输入输出结构
这里获取了模型第二套UV,里面是平滑法线数据 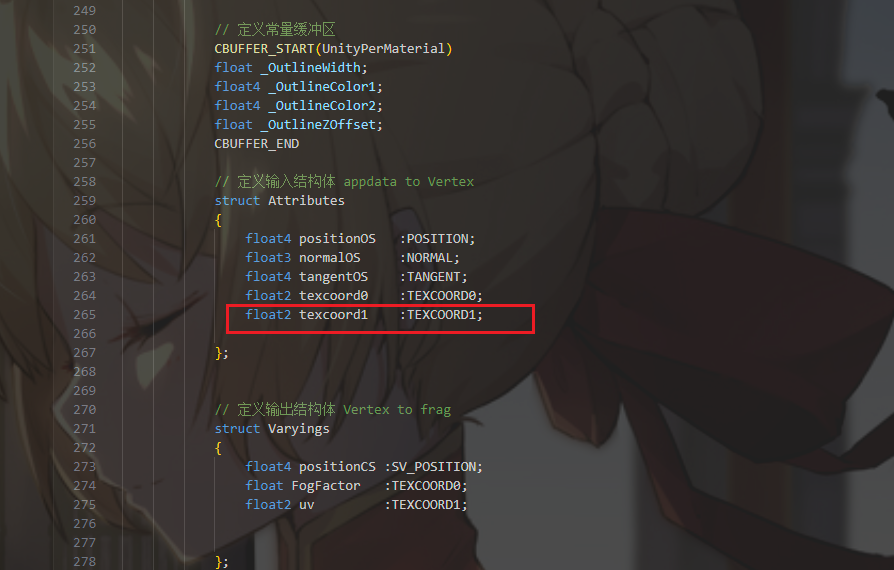
顶点着色器
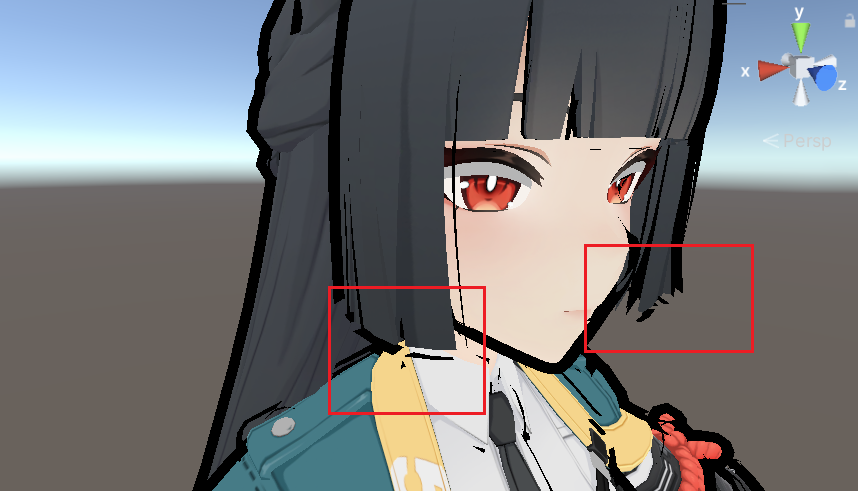
最简单的法线外扩,这样直接外扩会导致断线问题,所以才需要平滑法线数据
1
2
3
4
5
 //描边宽度
                float outlineWidth = _OutlineWidth * 0.001;
                //法线外扩
                float3 positionWS = positionInputs.positionWS.xyz;
                positionWS += normalInputs.normalWS * outlineWidth;
分段解析
先进行判断是否需要描边Pass,不需要的话直接返回0 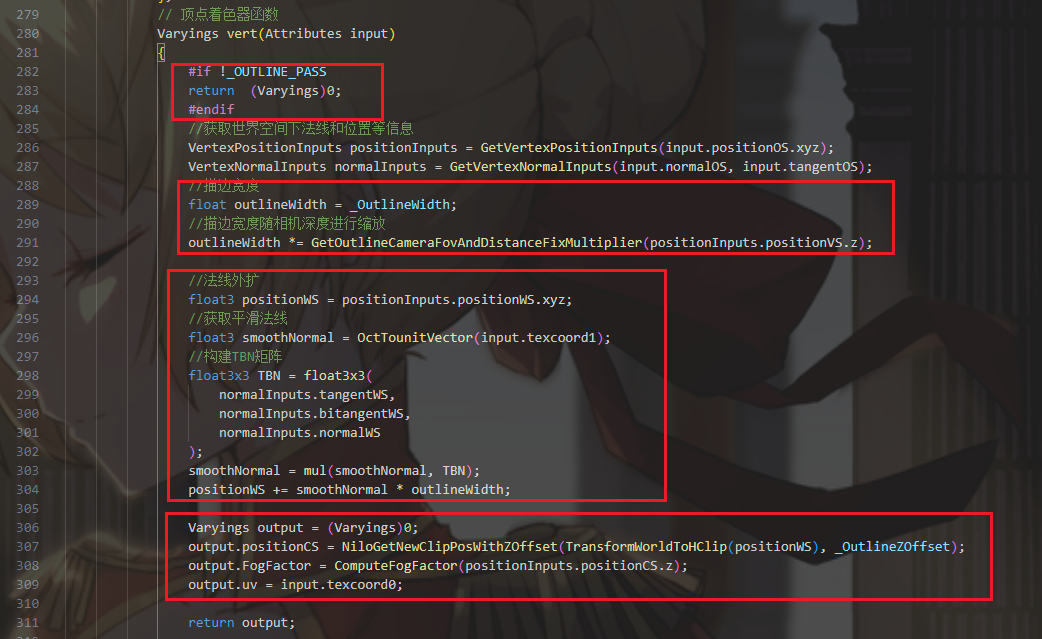 设置描边宽度
  这里缩放函数使用了Colin大佬的代码 https://github.com/ColinLeung-NiloCat/UnityURPToonLitShaderExample/blob/master/NiloOutlineUtil.hlsl
 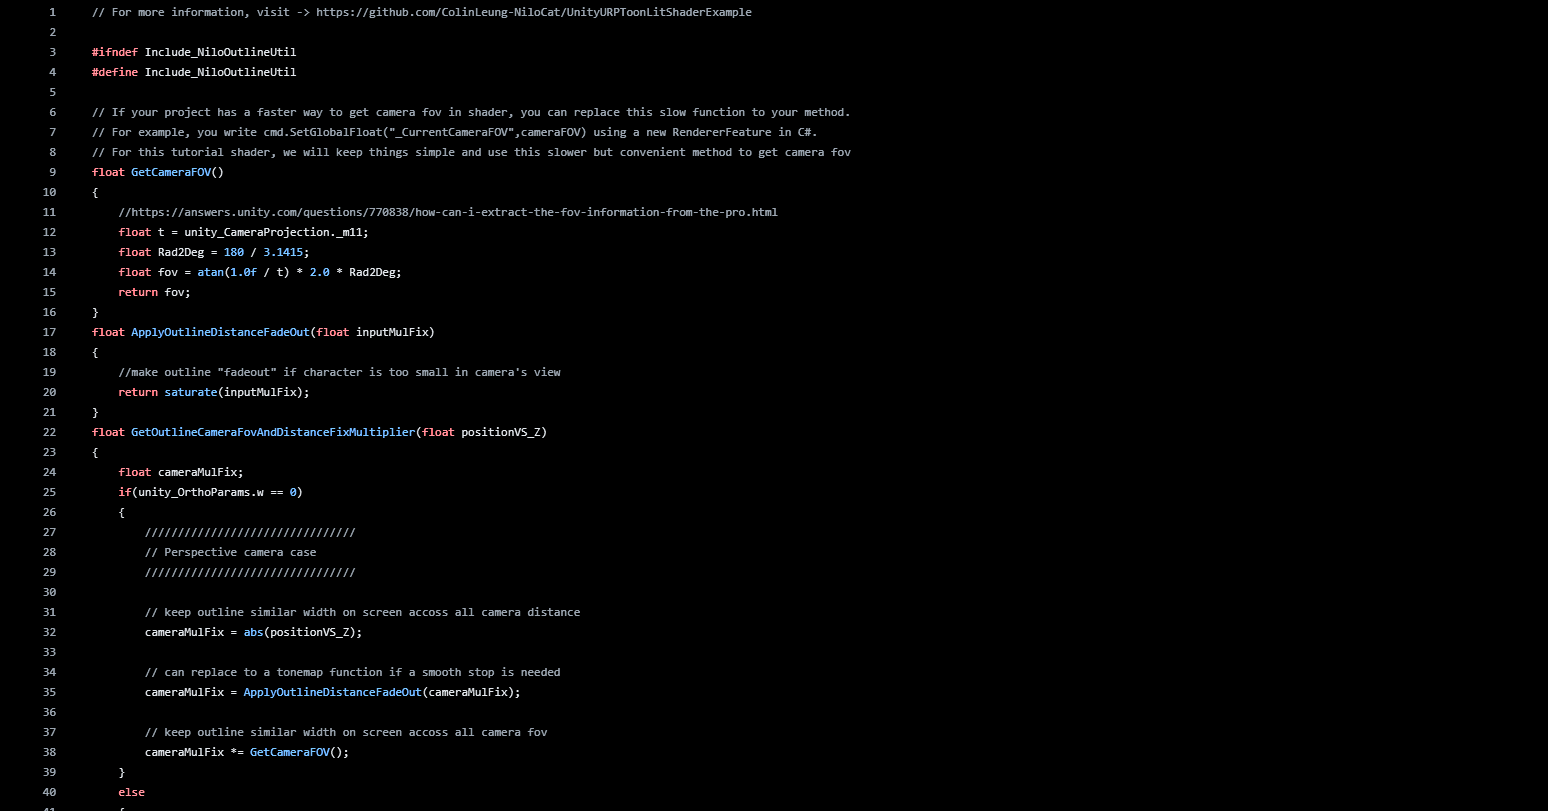 法线外扩需要读取第二套UV的平滑法线信息
 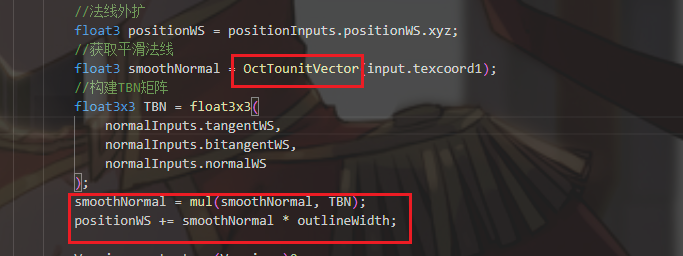 八面体映射读取函数
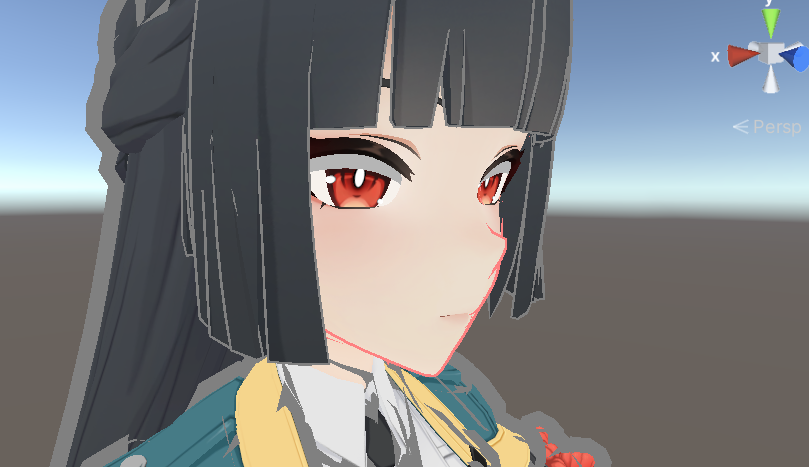
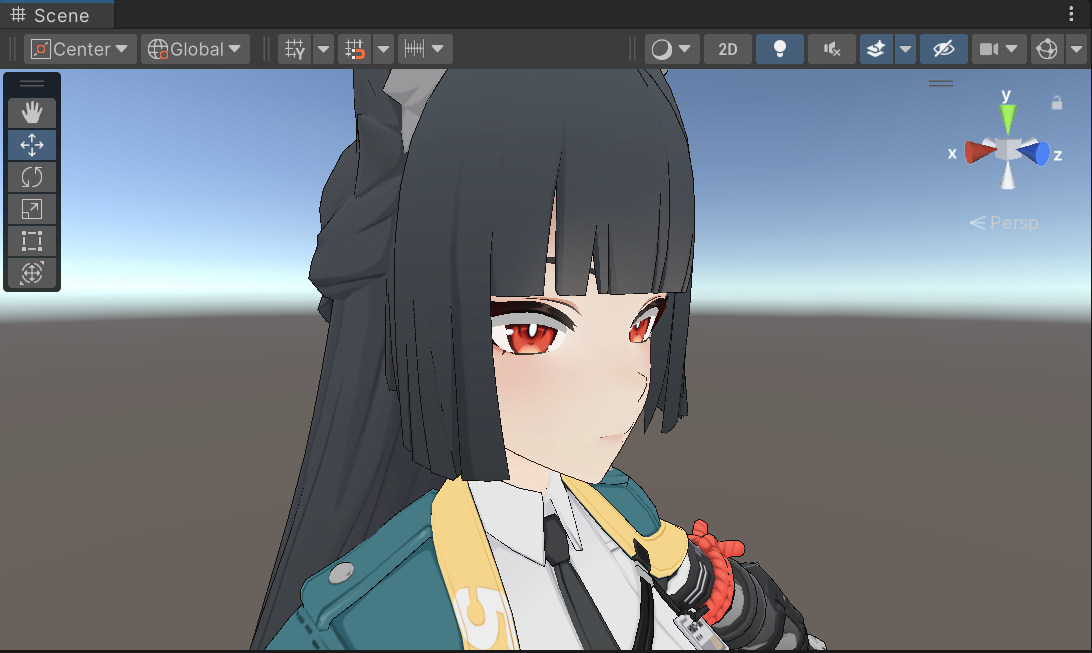
 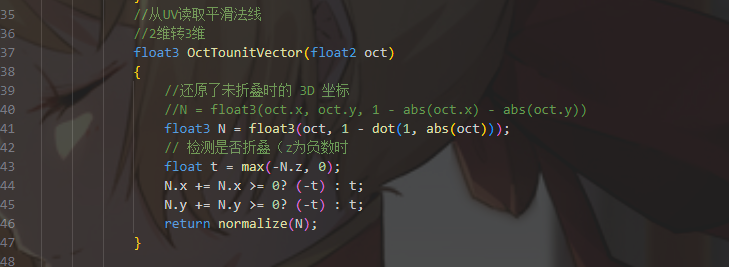 使用平滑法线后描边就不会断线了,但嘴角的线依旧有缺陷,所以需要将面部的描边向后偏移
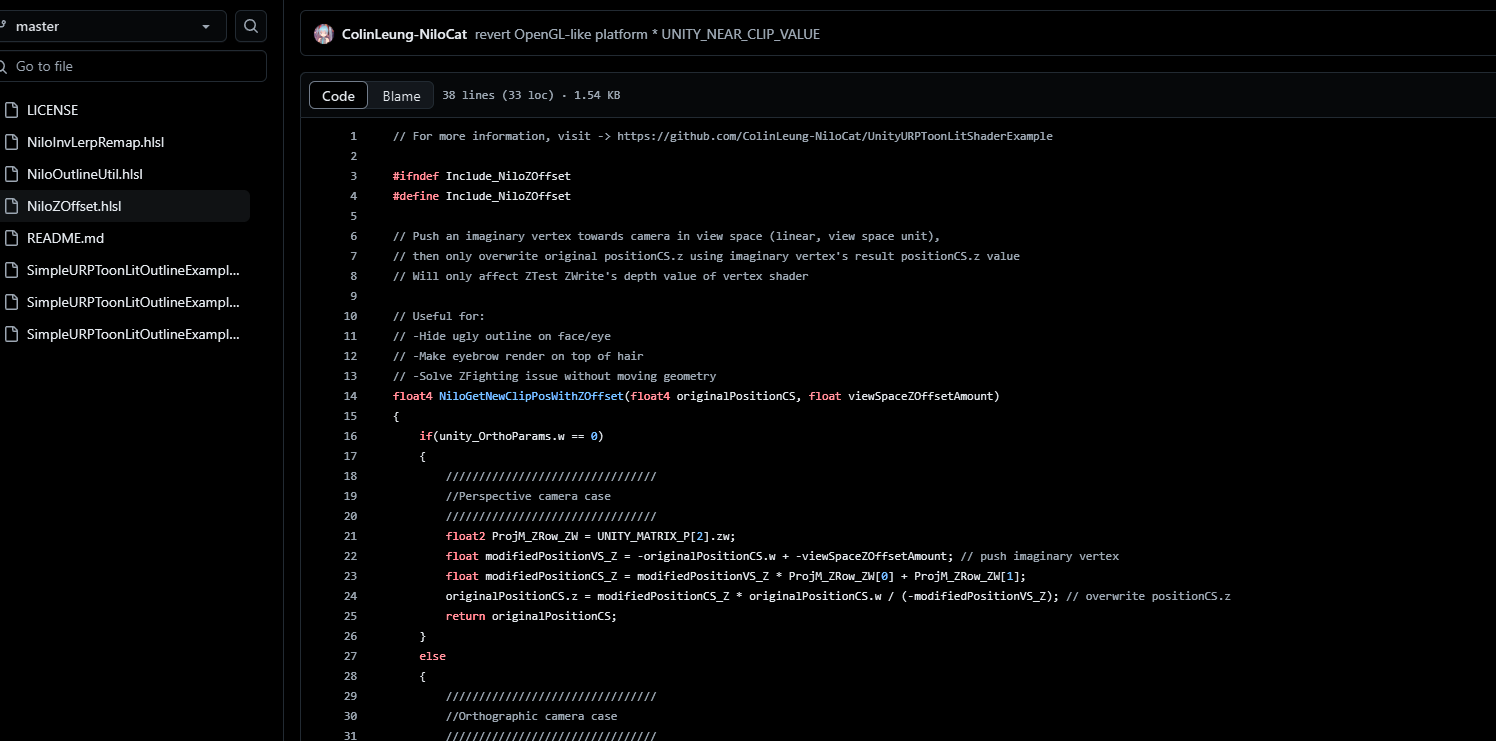
  这里需要裁剪空间下描边顶点Z轴方向偏移,代码来自于Colin大佬
顶点代码
1
2
3
4
5
6
7
8
9
10
11
12
13
14
15
16
17
18
19
20
21
22
23
24
25
26
27
28
29
30
31
32
33
34
35
  // 顶点着色器函数
            Varyings vert(Attributes input)
            {
                #if !_OUTLINE_PASS
                return  (Varyings)0;
                #endif
                //获取世界空间下法线和位置等信息
                VertexPositionInputs positionInputs = GetVertexPositionInputs(input.positionOS.xyz);
                VertexNormalInputs normalInputs = GetVertexNormalInputs(input.normalOS, input.tangentOS);
                //描边宽度
                float outlineWidth = _OutlineWidth;
                //描边宽度随相机深度进行缩放
                outlineWidth *= GetOutlineCameraFovAndDistanceFixMultiplier(positionInputs.positionVS.z);

                //法线外扩
                float3 positionWS = positionInputs.positionWS.xyz;
                //获取平滑法线
                float3 smoothNormal = OctTounitVector(input.texcoord1);
                //构建TBN矩阵
                float3x3 TBN = float3x3(
                    normalInputs.tangentWS,
                    normalInputs.bitangentWS,
                    normalInputs.normalWS
                );
                smoothNormal = mul(smoothNormal, TBN);
                positionWS += smoothNormal * outlineWidth;

                Varyings output = (Varyings)0;
                output.positionCS = NiloGetNewClipPosWithZOffset(TransformWorldToHClip(positionWS), _OutlineZOffset);
                output.FogFactor = ComputeFogFactor(positionInputs.positionCS.z);
                output.uv = input.texcoord0;

                return output;

            }
片元着色器
这里进行描边的染色,需要针对不同区域进行不同染色 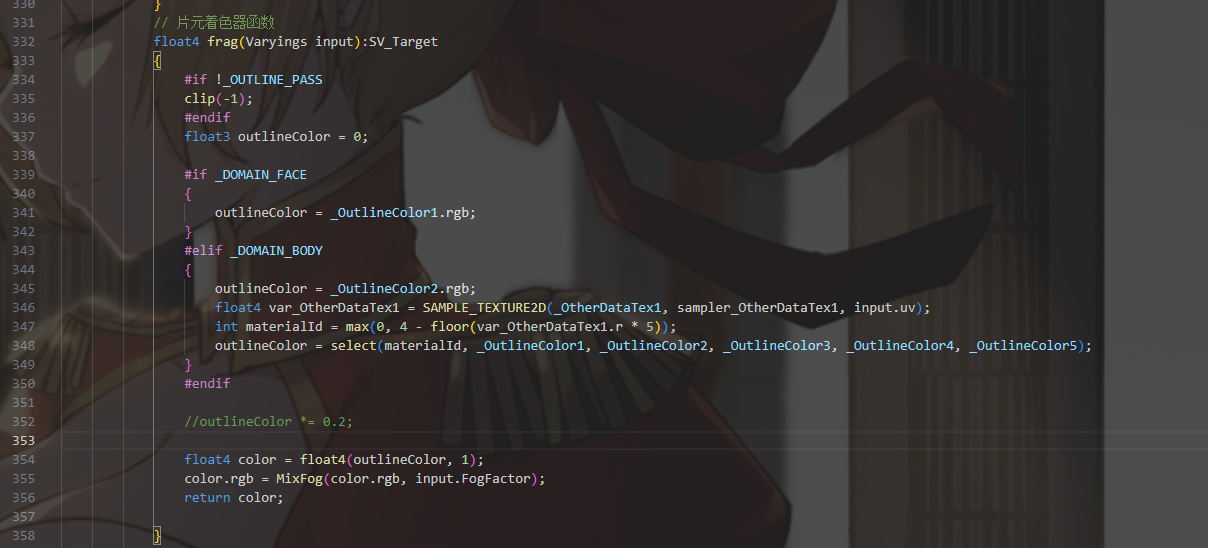
获取材质ID
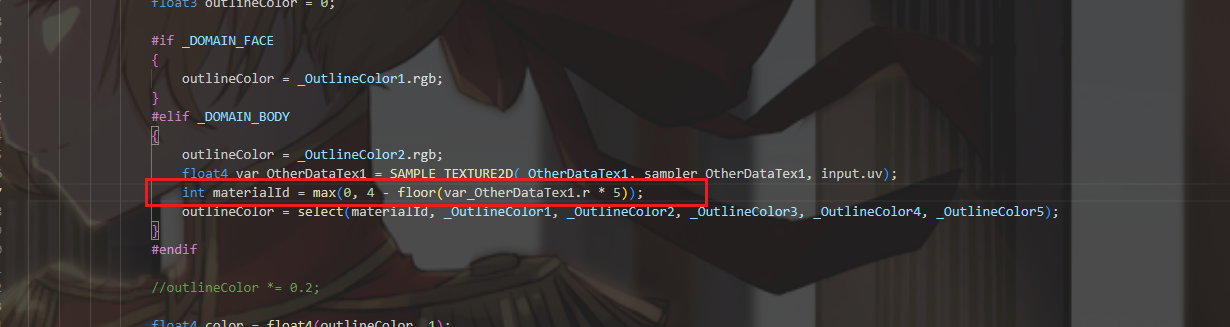 这里需要读取R通道,里面是存的材质ID
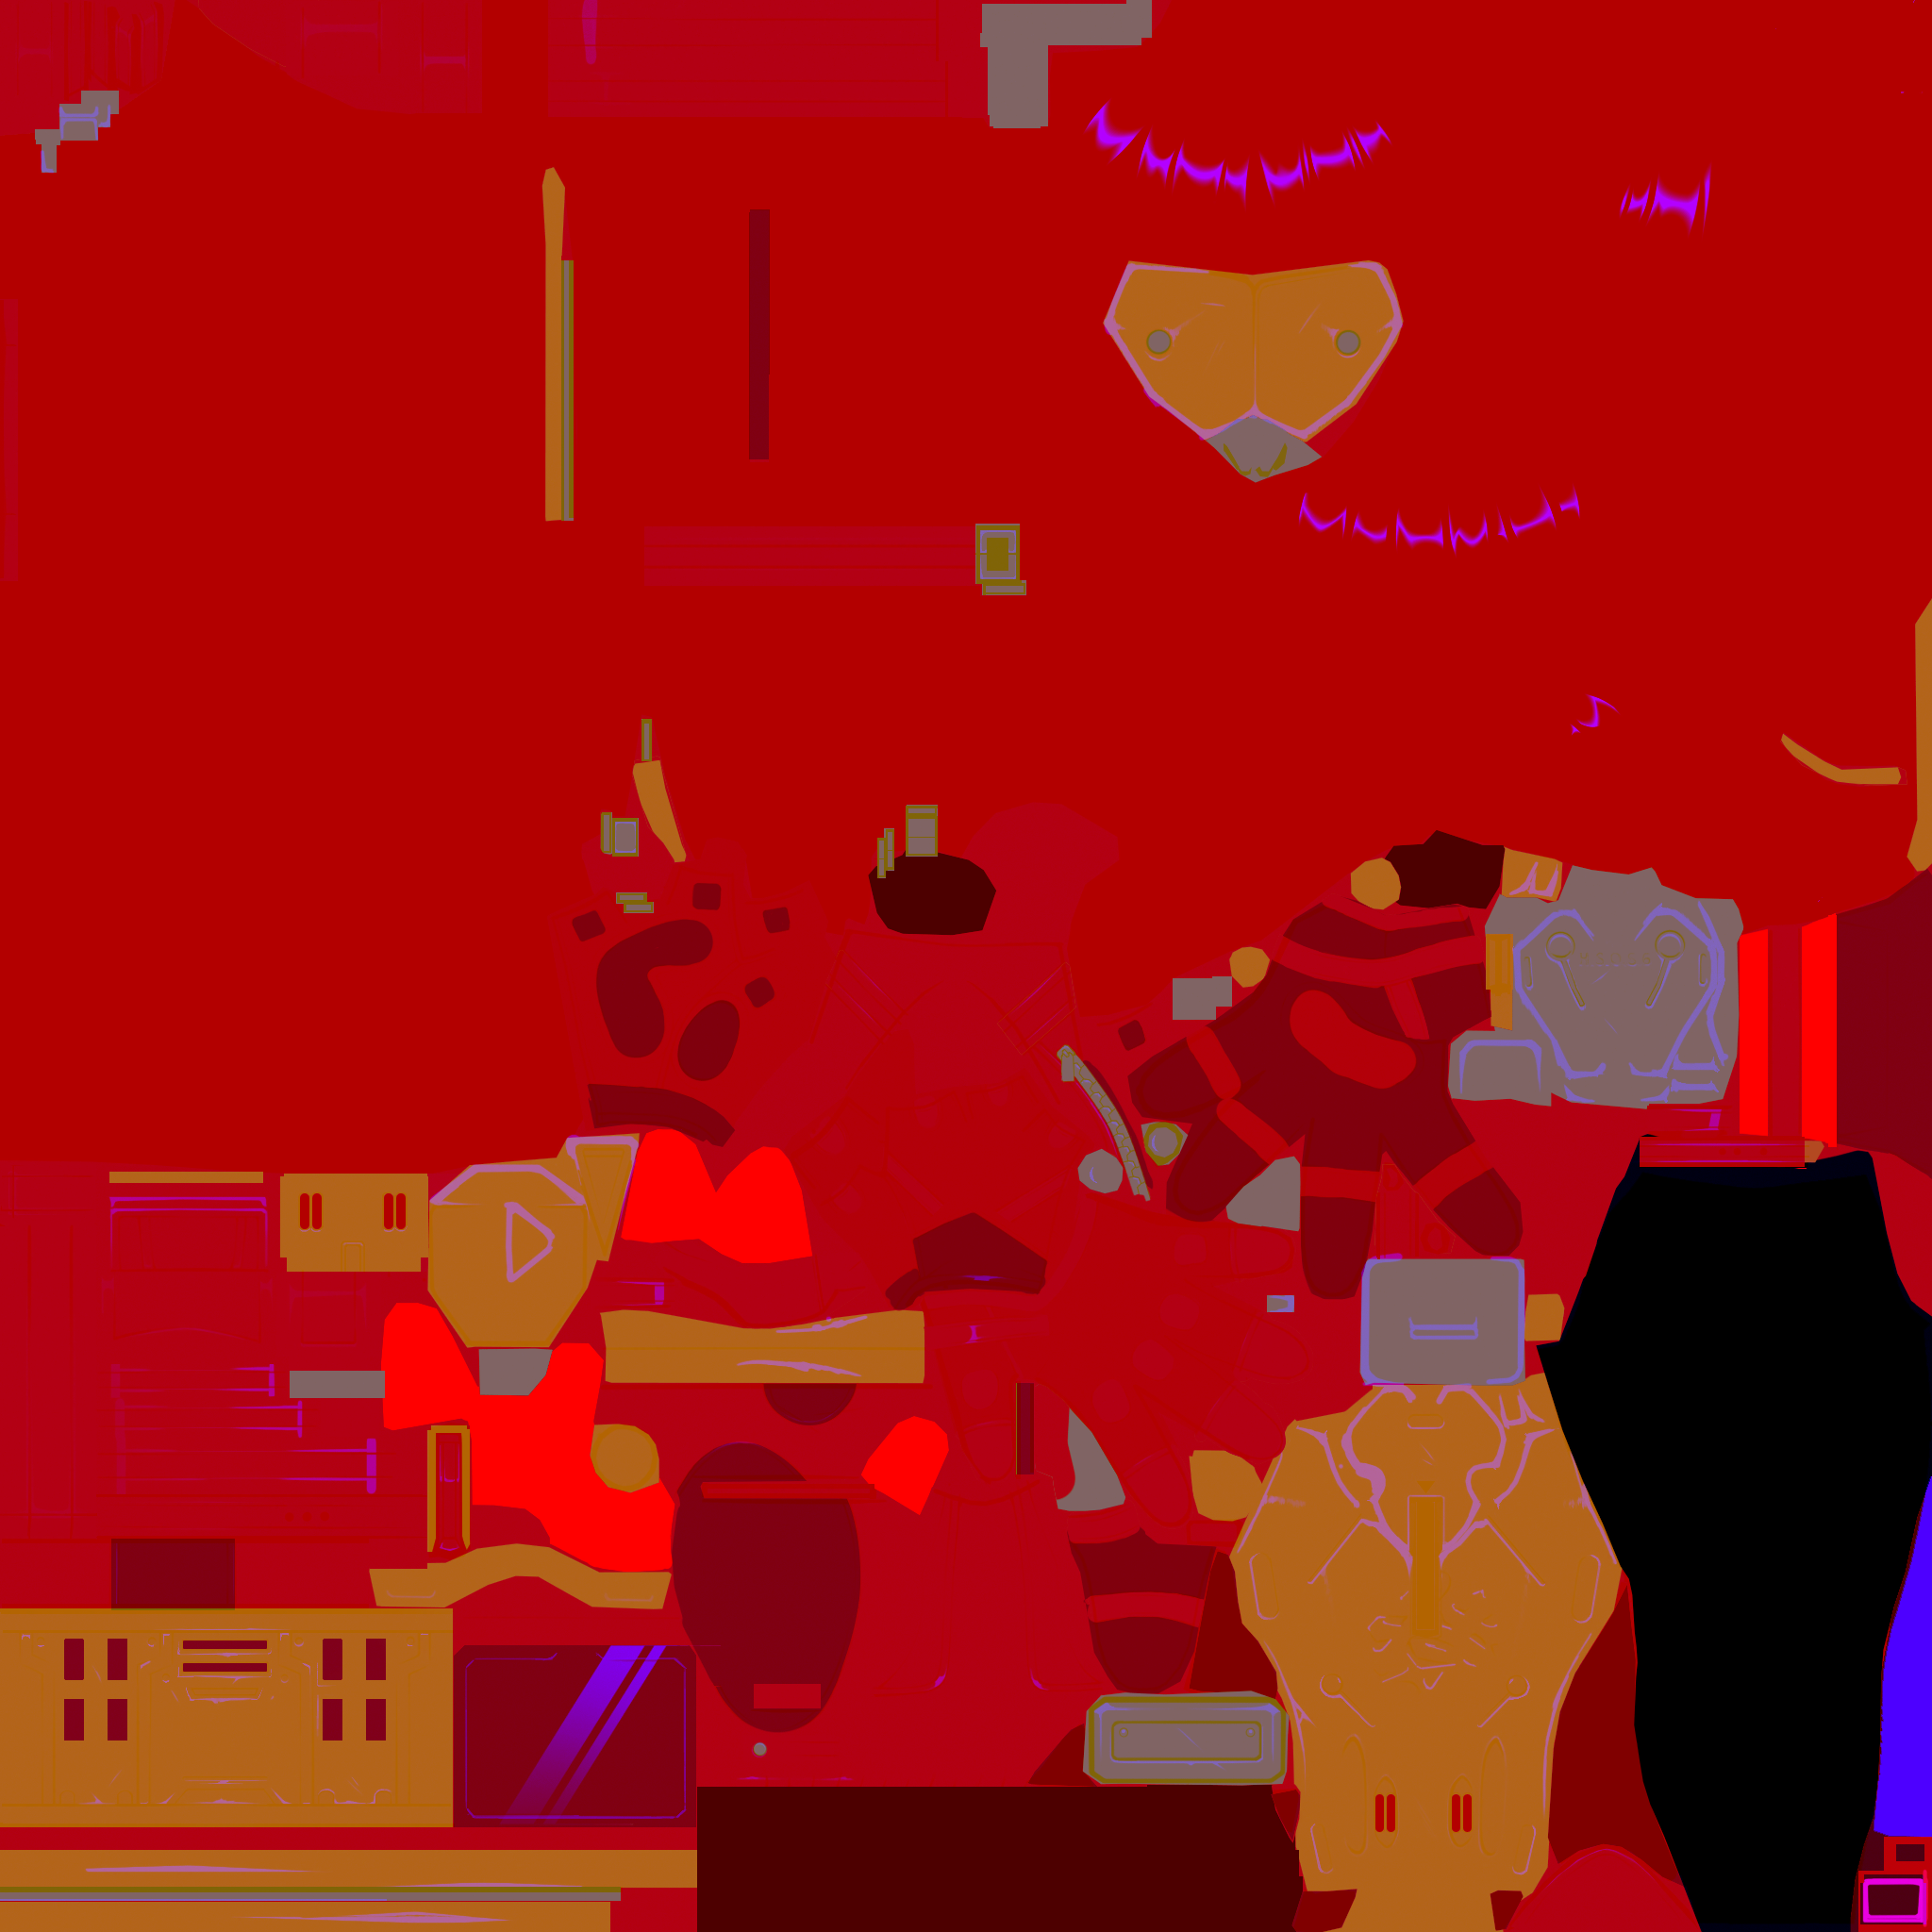

添加ID选择通用的函数宏
这里定义了4个函数宏,两个“##”表示拼接 TYPE TYPE##2 TYPE##3 TYPE##4 分别对应 1维到4维数据类型,同时在下面进行函数声明 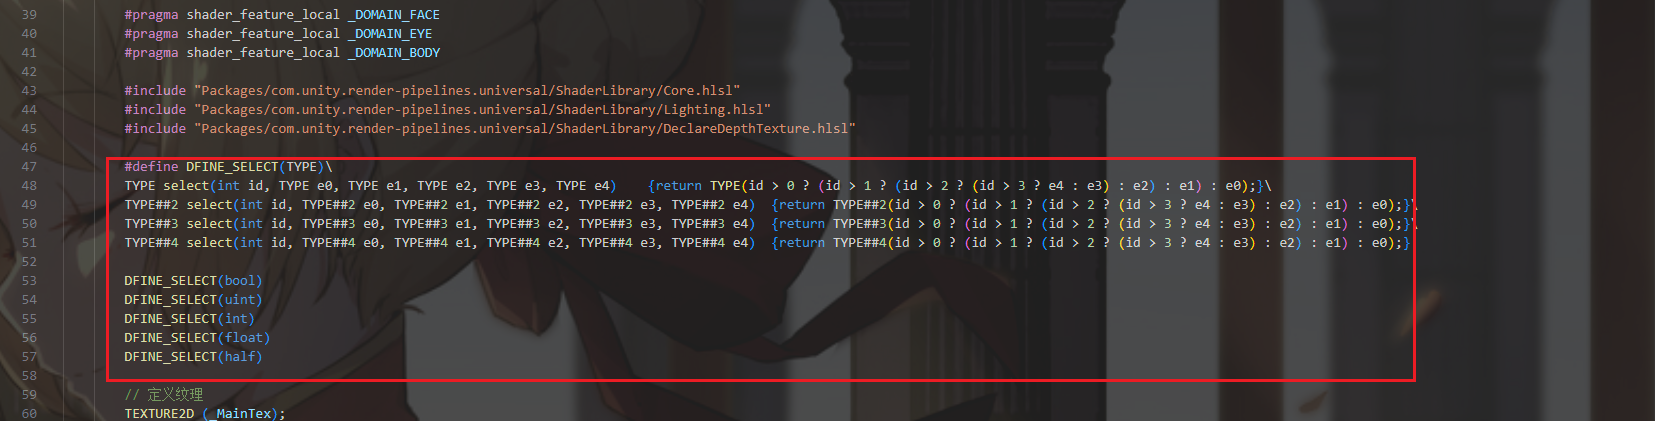
1
2
3
4
5
6
7
8
9
10
11
       #define DFINE_SELECT(TYPE)\
        TYPE select(int id, TYPE e0, TYPE e1, TYPE e2, TYPE e3, TYPE e4)    {return TYPE(id > 0 ? (id > 1 ? (id > 2 ? (id > 3 ? e4 : e3) : e2) : e1) : e0);}\
        TYPE##2 select(int id, TYPE##2 e0, TYPE##2 e1, TYPE##2 e2, TYPE##2 e3, TYPE##2 e4)  {return TYPE##2(id > 0 ? (id > 1 ? (id > 2 ? (id > 3 ? e4 : e3) : e2) : e1) : e0);}\
        TYPE##3 select(int id, TYPE##3 e0, TYPE##3 e1, TYPE##3 e2, TYPE##3 e3, TYPE##3 e4)  {return TYPE##3(id > 0 ? (id > 1 ? (id > 2 ? (id > 3 ? e4 : e3) : e2) : e1) : e0);}\
        TYPE##4 select(int id, TYPE##4 e0, TYPE##4 e1, TYPE##4 e2, TYPE##4 e3, TYPE##4 e4)  {return TYPE##4(id > 0 ? (id > 1 ? (id > 2 ? (id > 3 ? e4 : e3) : e2) : e1) : e0);}

        DFINE_SELECT(bool)
        DFINE_SELECT(uint)
        DFINE_SELECT(int)
        DFINE_SELECT(float)
        DFINE_SELECT(half)
最后进行输出 
 描边颜色x0.2压暗,除了面部为FF8181,其余先调成555555
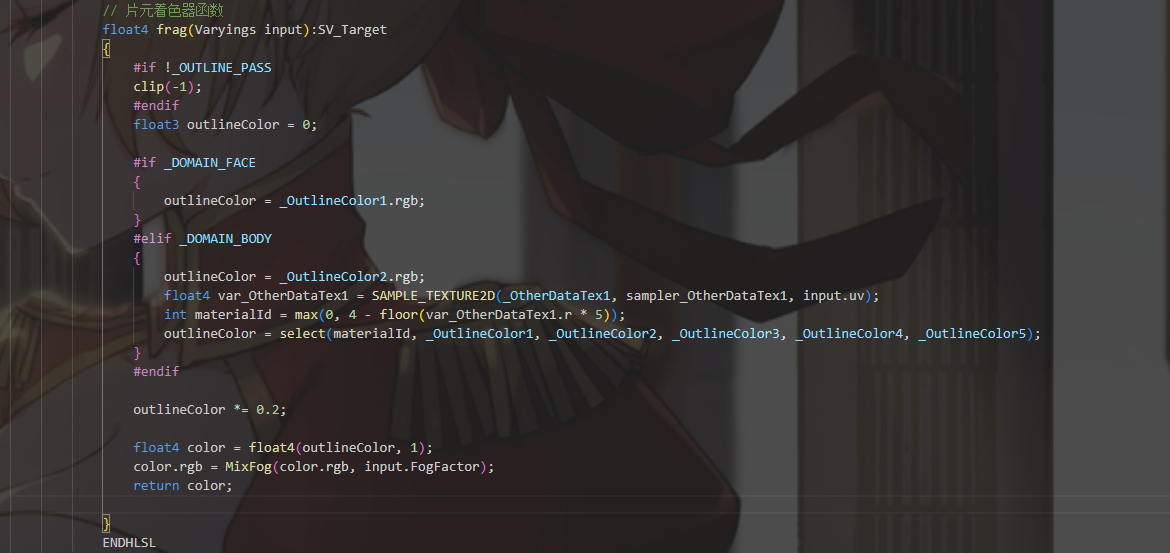
片元代码
1
2
3
4
5
6
7
8
9
10
11
12
13
14
15
16
17
18
19
20
21
22
23
24
25
26
27
28
 // 片元着色器函数
            float4 frag(Varyings input):SV_Target
            {
                #if !_OUTLINE_PASS
                clip(-1);
                #endif
                float3 outlineColor = 0;

                #if _DOMAIN_FACE
                {
                    outlineColor = _OutlineColor1.rgb;
                }
                #elif _DOMAIN_BODY
                {
                    outlineColor = _OutlineColor2.rgb;
                    float4 var_OtherDataTex1 = SAMPLE_TEXTURE2D(_OtherDataTex1, sampler_OtherDataTex1, input.uv);
                    int materialId = max(0, 4 - floor(var_OtherDataTex1.r * 5));
                    outlineColor = select(materialId, _OutlineColor1, _OutlineColor2, _OutlineColor3, _OutlineColor4, _OutlineColor5);
                }
                #endif

                outlineColor *= 0.2;

                float4 color = float4(outlineColor, 1);
                color.rgb = MixFog(color.rgb, input.FogFactor);
                return color;

            }
Enjoy Reading This Article?
Here are some more articles you might like to read next: